
When you apply a high-performance exterior stain or varnish to your wooden door, you can protect it from the elements while keeping the wood moisturized.
Staining a door can give it a more vibrant and rich appearance, particularly if the external surface has faded due to weather, sun, or even normal aging. Rather than painting a new door that doesn’t match the wood grain on your home’s trim or furniture, you may prefer to stain it.
To stain a door, follow these steps:

- Select a stain that suits the wood.
- Take the door off.
- Sand the door’s exterior surface.
- The door should be stained.
- Wipe down the door.
- Allow your door to dry naturally.
- Reattach stained doors.
The process of staining a door is a simple do-it-yourself project. Everything you’ll need to stain the door is available at your neighborhood home improvement store: A stain and gloss of your choice, a staining tray, pads, sponges, or bristle brushes, gloves, rags, and sandpaper. You might also want to have a large tarp on hand to spread out on the floor. You can prop the door upon the tarp and stain it without creating a mess. The work area should be well-ventilated to increase your overall comfort. After learning how to stain a wood door, you might want to try staining or painting other doors in your houses, such as bathroom cabinet doors, drawer fronts, kitchen cabinets, or the garage door. But, before you tackle a garage door makeover or even the front exterior door of your home, you should practice staining a wooden door inside your home. Experimenting with interior doors will allow you to gain familiarity with the staining process.
How to Stain a Door: Steps to Follow
- Select a stain colour:- When it comes to choosing a stain color, there are lots of options to choose from. Traditional timber materials include pine, oak, maple, cherry, mahogany, and walnut. While your door may not be made entirely of one of these natural woods, you can choose a stain that is inspired by one of them. Each one has a distinct grain pattern and coloration but, since stains are synthetic, they have numerous choices, such as espresso, burgundy, and chocolate. At your local hardware store, utilize their computer database to match a piece of wood to a comparable stain and therefore stain your door to match. This is an excellent reason to save additional samples or pieces if you ever need carpentry work done on your home. A small image of your trim, flooring, or furnishings is enough to help you locate some stain samples. Bring these samples home and choose your favorite. Remember, you can stain your door to match the rest of the wood in your home or you can stain it to contrast subtly with the rest of your decor and make an interior design statement!
- Select a stain that suits the wood:- Always use a high-quality stain with a petroleum base, such as Minwax or Craftsman, and mix it according to the manufacturer’s instructions. Some people believe that gel stains are best for small areas, whereas others believe that poly stains are better for larger areas due to their versatility. Go to your favorite hardware store and look for a colour and type of wood stain that matches the type of wood and the look you want for the door.
- Take the door off:- Whether your door is sliding or hinged, you’ll need to remove it from the frame before you can begin staining it. If your doors are hinged, begin by shutting them. Push out the hinge pin from the bottom using a hammer and nail, by inserting the nail into the hinge’s bottom and lightly tapping it upward. Use the hammer and nail to push the hinge pins out of the hinge rather than pulling them out completely.
Once the pin is mostly out of the hinge, tap the underside of the pin’s head with a screwdriver until it’s loose enough to remove with your bare hands. You can now just open the door a little and remove the hinges. You can wedge something like a crowbar under the door to remove the weight of the door only, not the hinges.
Also, you will have to flip the door vertically in order for it to lie flat, so remove anything that might keep it from doing so. This may include the door’s hinges, knobs, handles, deadbolts, and, in some cases, even the weather stripping.
To prevent the stain from spreading, cover the window with paper and tape. Masking tape might leave behind some sticky residue on the glass, so you should use painter’s tape.
- Sand the door’s exterior surface:- Finally, after the door has fallen off its hinges, it is time to deposit it into the proper work area. To prevent anything you don’t want to stain from getting stained, spread a tarp or tack cloth out beforehand. In order to sand and stain the door, it must be absolutely flat. While a sander can help reduce the amount of work necessary, you may still prefer to do the job by hand due to a more enjoyable experience.
Sanding the wood will assist in even out its texture, allowing you to apply a consistent application of stain. Your best bet is to sand in the direction of the wood grain using 120-grain sandpaper. This is easy to determine by looking in the direction of the rays; you’ll want to sand parallel to the rays rather than perpendicular to them. Don’t overdo the sanding section because it won’t hold the stain if the door is too smooth. To that end, you’ll probably want to limit your sandpaper to 150-160 grains; finer grit sandpaper or steel wool may result in an overly smooth door.
Even if you want to hurry to stain the door, keeping your workspace clean may not seem like a high priority. However, if you do not remove sawdust from your workspace, it may be blown onto the wood, resulting in an uneven staining job—and possibly a bumpy texture if sawdust adheres to the stain during the drying process.
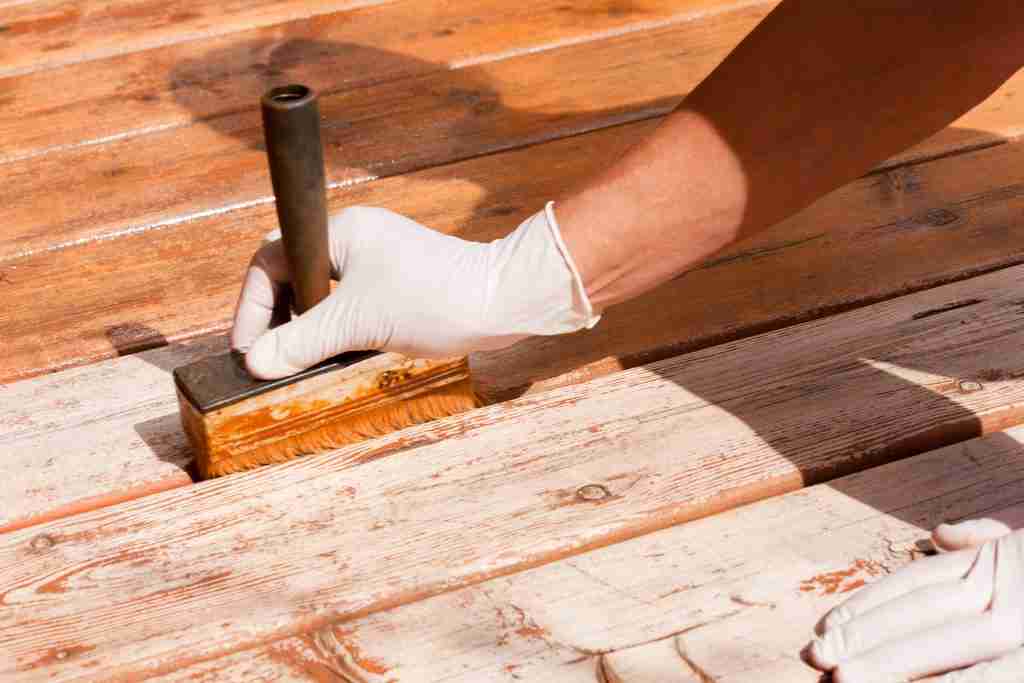
- The door should be stained:- Now comes the main act. Pry open the stain cans with a flathead screwdriver. Pour the stain into a staining tray and use a pad or brush to apply it to the door. Make sure that any excess stain drips off before applying it to the door, whether you’re using pads or a brush.
It is important to note, however, that sometimes a pre-stain wood conditioner will be useful. Using this kind of wood conditioner will be especially beneficial to porous wood doors, like those made from pine, as they will allow the stain to be applied evenly without absorbing the finish unevenly. When using stains on doors that are made of softer, more porous wood and have not been pretreated, you may end up with doors that look blotchy or speckled due to uneven absorption of the stain. To ensure that your wood gets an even, attractive stain, you should use a wood conditioner.
Regardless of what type of stain you use, porous and softer woods will not look good unless they are conditioned first. Test the wood conditioner in an inconspicuous location to determine whether or not to use it on the door. Even though you will have to perform an additional step on your end, the results of your door-decorating efforts will be well worth it if you apply the clear coat of such a conditioner.
Follow the grain of the wood as you paint the stain on the door. Use a light touch in the beginning, and then apply more pressure. It’s up to you whether or not you would like to use a brush to apply the stain, but you should go back over the stain to ensure that all brush strokes are blended in. Wipe it up immediately to prevent the appearance of streaks or unevenness.
- Wipe down the door:- After you’ve stained the door, you should use a lint-free rag to wipe it down. After staining and varnishing the door, wipe it down to remove any remaining streaks or drips that may have formed, which may have caused uneven and blotchy staining in the first place. Furthermore, wiping it down will aid in shortening the drying time.
- Allow your door to dry naturally:- Now is the time to let the breeze dry your door. The stain and varnish will dry in a day or two. This time period may be extended in humid climates or enclosed spaces. So, after the door is dried, you’ll want to flip it over and stain the other side. Once both sides are stained, allow it to dry, then wipe down and air dry.
It takes more coats to achieve a deeper, richer look when applying stain. Although the stain should be allowed to dry completely before applying another coat, make sure to apply a second coat after the first is dry.
- Reattach stained doors:- Use any hinges, knobs, locks, handles, and weather stripping to reassemble the door. Determine the size of the aperture, then set the slide as far as it will go. This is a great time to purchase new door hardware, like handles or weather stripping, as well as an excellent time to implement routine maintenance tasks, like weather stripping and regular oil changes.
To rehinge the door can seem like a tough task. You just have to hold your door and pin it until your knuckles are attached to the door frame with the knuckles. Push a stick into any set of knuckles and then put another stick into the rest of the two or three hinges. Usually, if you close your door, that’s easier. If you find it difficult to line up your knuckles, just use an eyepiece under the door to lift it.
*The Best Way to Stain a Door
Whether you’ve just purchased a factory-made door or you want to spruce up an old door you already have, staining is an extremely simple DIY project that adds incredible depth to the door. You just need a clean and open working environment, a few days, and simple hardware store items.
Door staining and rehanging, in most cases, are not too difficult. Slab doors are brand new, so it is possible they are pre-hung doors (with a frame). If it is a slab door, you will have to execute a few extra steps in order to hang it. While all kinds of doors benefit from a facelift, it is more necessary to accomplish than you might think. At this point, you will be able to consider other stains, such as cabinets or an old dining table.
The new stain gives your wooden door a much richer look, whether your front door is stained or an interior door. Oil-based stain and varnish last up to two decades, while water-based lasts three years. Gel stain and shellac-based stain can last much less time. In any case, you will want to keep your stain lasting longer by keeping the door clean and polishing it with wax or polish every six weeks.
Preventative measures
It is now easy to keep a clean appearance because you have deep cleaned your doors. Simple maintenance techniques can help you and save your time, as well.
Once in a while dust the surfaces of your doors to help keep them free of dust and dirt. Then use a moist cloth to wash away any stains. By utilizing these easy-to-follow methods, you can cut down on your woodworking time, and keep your wooden doors looking pristine.